


How to Install Fiberglass Fence Posts for Electric Fencing
Introduction
Fiberglass fence posts are a practical option for many temporary and semi-permanent electric fencing jobs. They are lightweight, easy to carry, and can work well with compatible insulators and conductors. But a fence is only as useful as its installation. Posts placed too far apart, pushed into unsuitable ground, or fitted with the wrong clips can leave a line sagging or difficult to maintain. This guide explains how to install fiberglass fence posts step by step and what to check before putting livestock behind the fence.
1. Decide What the Fence Needs to Do
Before installing any posts, define the purpose of the fence. A temporary cross-fence for rotational grazing has different requirements from a boundary fence or a horse paddock.
Fiberglass posts are commonly used for portable or lightweight electric fence lines. They may be suitable for temporary livestock divisions, garden or field sections, and other applications when the post design and fence layout match the job.
Do not assume a lightweight fiberglass post is suitable for every corner, gate, or high-tension section. End and corner assemblies often need stronger structural support. Where livestock escape could create a serious risk, use a properly designed boundary system and seek professional advice where needed.
2. Check the Ground Before You Start
Walk the proposed fence line and look for changes in terrain, stones, roots, wet patches, and areas where machinery or animals may pass.
Ground conditions affect how easily posts can be installed and how well they stay in place. Firm soil may provide good support, while very dry, compacted, rocky, or waterlogged ground can make installation more difficult.
If the ground is hard or stony, test a few posts before installing the entire line. Do not force a post into the soil if it is bending, cracking, or becoming damaged. Choose a suitable installation method or a different post design for those conditions.
3. Mark the Fence Line and Post Locations
Mark the beginning and end of the fence, corners, gates, and any points where the terrain changes.
A straight fence line is easier to install and maintain. Use a visible marker or temporary string to help keep the line aligned, especially across a long paddock.
Do not space every post evenly without considering the landscape. A dip, rise, or sharp change in direction may need an additional support point. Put posts where they help the conductor follow the ground and maintain the intended height.
4. Choose Suitable Post Spacing
There is no single spacing that works for every fiberglass electric fence. The right distance depends on conductor type, terrain, wind exposure, livestock, and how much tension the line carries.
Lightweight polywire on flat ground may allow wider spacing than heavy or wide polytape. Exposed fields can place extra pressure on posts, while uneven ground may require closer support.
Use these practical checks:
Keep the conductor at a consistent and appropriate height.
Add posts at dips, rises, and changes in direction.
Use closer spacing where wide tape catches wind.
Check the fence from the side for excessive sagging.
Follow the post and conductor manufacturers' guidance.
If the line looks unstable or the conductor sags noticeably between supports, add posts rather than trying to solve every problem by increasing tension.
5. Install the Posts in a Consistent Position
Place each post so the insulator or holder faces the direction needed to support the conductor. Keep the posts aligned and install them to a consistent depth according to the product design.
If the post has a footplate or step feature, use it as intended. Apply pressure in the designed installation area rather than striking the post with a hammer or using force that could damage the fiberglass.
Avoid twisting or bending the post excessively during installation. Fiberglass can flex, but it should not be treated as indestructible. Inspect posts for cracks, splinters, or damaged fittings before use.
6. Fit the Correct Insulators and Holders
Not every insulator fits every fiberglass post. Check that the clips, holders, or built-in slots are compatible with the post diameter and conductor type.
The conductor should sit securely without being pinched or damaged. If you use polywire, polytape, or a different conductor, confirm that the holder is designed for it.
Keep conductors separated where the fence design requires insulation. A poorly fitted insulator can allow the wire to contact the post or another conductor, creating an unwanted electrical path or mechanical problem.
For a system with multiple fence lines, plan the height of each conductor before installing all the posts. This helps keep the finished fence consistent and reduces the need to reposition holders.
7. Attach the Conductor and Check Tension
Once the posts and insulators are in place, attach the conductor according to the fence design. For portable systems, reels can make deployment and later collection easier.
Apply enough tension to keep the line orderly, but do not overtighten it. Excessive tension can pull posts out of position, damage fittings, or create unnecessary strain at corners and ends.
For long runs, pay particular attention to the end and corner supports. Lightweight line posts are generally intended to support the conductor along the run, not to carry all the tension at a turn.
Walk along the entire fence and check for:
Loose or poorly seated conductors.
Posts leaning in the same or opposite direction.
Excessive sagging.
Contact with grass, branches, or other objects.
Insulators that have slipped or become damaged.
8. Connect and Test the Electric Fence
A mechanically neat fence is not necessarily an electrically effective fence. Connect the conductor, energizer, grounding system, and accessories according to their instructions.
Before introducing animals, use a suitable electric fence tester to check voltage at several points, including the far end. Testing only beside the energizer may miss a problem farther down the line.
If the voltage is lower than expected, check for vegetation contact, poor connections, damaged conductors, inadequate grounding, or an energizer that is not suitable for the total fence load.
Never use your body to test whether a fence is live. Follow the energizer manufacturer's safety guidance and applicable local requirements.
9. Common Installation Mistakes to Avoid
Spacing posts too far apart This can lead to sagging, poor conductor height, and instability. Add support where needed.
Using fiberglass posts as corner anchors Lightweight line posts may not be designed to resist concentrated tension. Use suitable end and corner assemblies.
Forcing posts into hard ground This can damage the post. Test the soil and choose an appropriate installation approach.
Choosing incompatible insulators A holder that does not match the post or conductor can slip, damage the wire, or compromise the fence layout.
Ignoring vegetation Grass and branches touching the conductor can reduce fence performance and increase maintenance.
Skipping voltage checks Always test the fence after installation and during routine maintenance.
10. Maintain the Fence After Installation
Inspect the fence regularly, particularly after strong wind, heavy rain, livestock contact, or changes in grazing conditions.
Check post alignment, conductor height, insulators, connections, vegetation, and voltage. Replace posts or fittings that show damage rather than waiting for a small problem to become a fence failure.
Portable electric fences are often moved frequently. When collecting the fence, release tension carefully, wind the conductor neatly, and remove posts without damaging their foot or shaft. Store them in a way that avoids unnecessary bending or impact.
Conclusion
Installing fiberglass fence posts is straightforward when you plan the line, match spacing to the terrain and conductor, use compatible insulators, and test the finished fence. The most important point is to design the fence around its purpose rather than relying on a single spacing rule. Lydite Fence offers fiberglass and other electric fencing components for different farm applications; compare the post design, fittings, and intended use before selecting a system.
Frequently Asked Questions
How deep should fiberglass electric fence posts be installed?
The correct depth depends on the post design, soil, and intended application. Follow the manufacturer's installation guidance and make sure the post remains stable without forcing it into unsuitable ground.
How far apart should fiberglass fence posts be?
Spacing depends on conductor type, terrain, wind exposure, and livestock. Start with the manufacturer's guidance, then add supports where the line sags, changes elevation, or becomes unstable.
Can fiberglass fence posts be used with polytape?
Some fiberglass posts are designed to work with polytape, but the holder or insulator must be compatible with the tape width and post design. Check the product specifications before installation.
Are fiberglass posts suitable for permanent electric fencing?
Some fiberglass post systems may be used in suitable long-term applications, but lightweight portable posts should not automatically be treated as permanent boundary supports. Consider the fence structure, tension, livestock, and risk if the fence fails.
Do fiberglass fence posts need separate insulators?
It depends on the design. Some posts have built-in conductor holders, while others require separate compatible insulators. Confirm that the fitting provides the intended electrical insulation and mechanical support.
Image Suggestions
**Fiberglass electric fence posts laid out before installation**
Alt text: Fiberglass electric fence posts prepared for installation along a farm fence line.
**Close-up of a fiberglass post being installed in pasture soil**
Alt text: Farmer installing a fiberglass electric fence post in pasture soil.
**Fiberglass fence post with compatible insulator and polywire**
Alt text: Fiberglass electric fence post fitted with an insulator supporting electric fence polywire.
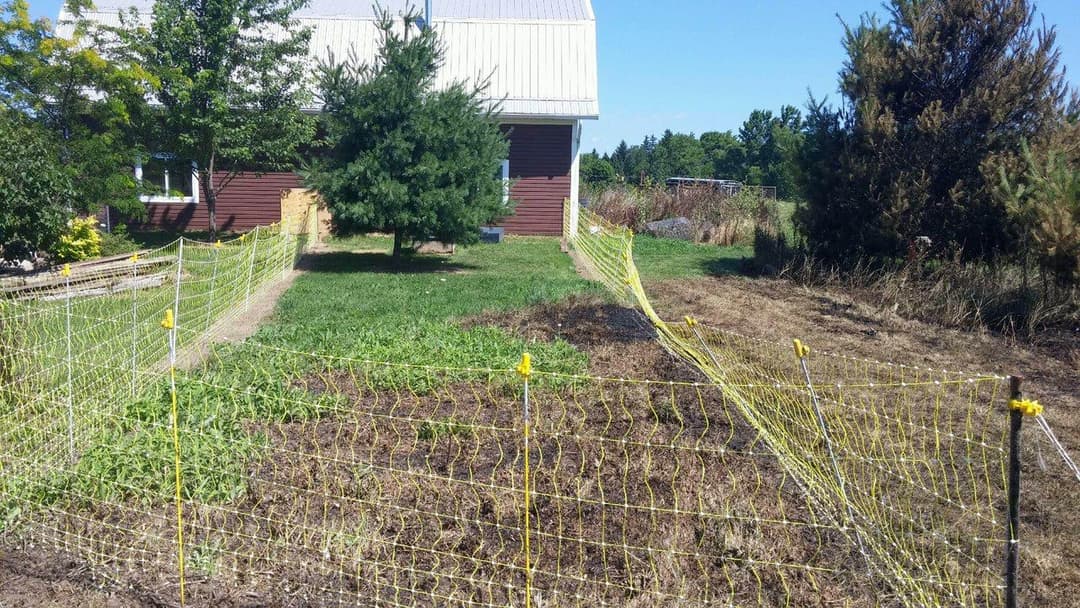
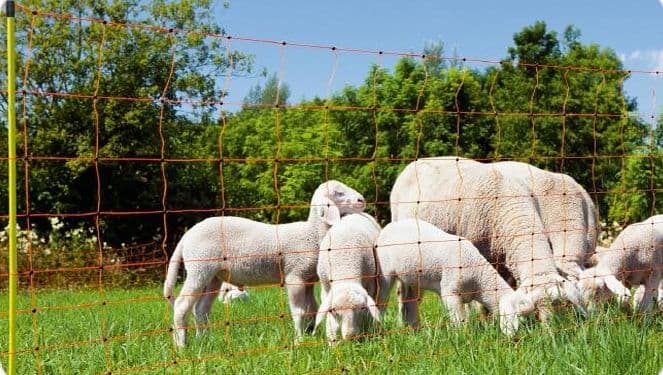
**Completed temporary electric fence across a pasture**
Alt text: Temporary electric fence supported by fiberglass posts across a livestock pasture.







Wuxi, China
Zhihui568, Jianghai Western Road
Wuxi, Jiangsu, China
Head Factory
Area A, Shuangmiao Industrial Park, Wutong Road, Huishan District, Wuxi City, Jiangsu Province, China


